
This Azure service has been here for a while now, but lately got a few improvements that make the integration and use of it even easier and more seamless than before.
Just before going any further, if you haven’t read anything about it, I recommend you to start with this article first https://docs.microsoft.com/en-us/azure/search/search-what-is-azure-search as I am not going to dive too much into the details today. This reading is going to be about my personal experience of getting a Cognitive Search service provisioned with a bunch of data (of one source) connected to it.
Personally, I like to look at the problems to solve with my business lens. What that means is focusing on building content (business value) rather than building the search engine (feature). I am not saying that compromising (non-business related) system features that are helping users to enhance their User system Experience is a good thing to do. All I am saying is stop re-inventing the wheel!
Hey Devs, don’t give me this wiggle face saying things like: “c’mon, it’s not that hard to do it by yourself!”. Yes, but actually it is hard from the time complexity point of view … To build a great search engine with features your audience is going to like would take many weeks of man/hours to do so. These features include Auto-completion, geospatial search, filtering, and faceting capabilities for a rich UX, OCR (ideally backed by AI), key phrase extraction, image text found results highlighting, and all of that with the ability to scale this service as needed and add as many multiple (and different) data sources as needed.
Can you see my point, now? Did one of your eyebrows just lift up? :)) Anyway .. let’s jump into it and see how long this is going to take me to build in the Azure portal.
Steps how to build a first Cognitive Search as a Service
1) Go to the Azure portal, search for Cognitive Services and add a new one called “Azure Cognitive Search“

2) As for all services in Azure space, you need to fill up what Subscription and Resource Group this service will belong to. And as the next step, preferred URL, Geographic location of the data center, and pricing Tier. I am choosing the free Tier (which should be enough for this exercise) and the location close to NZ. The next step is to click on Validate, and on Create button afterward.

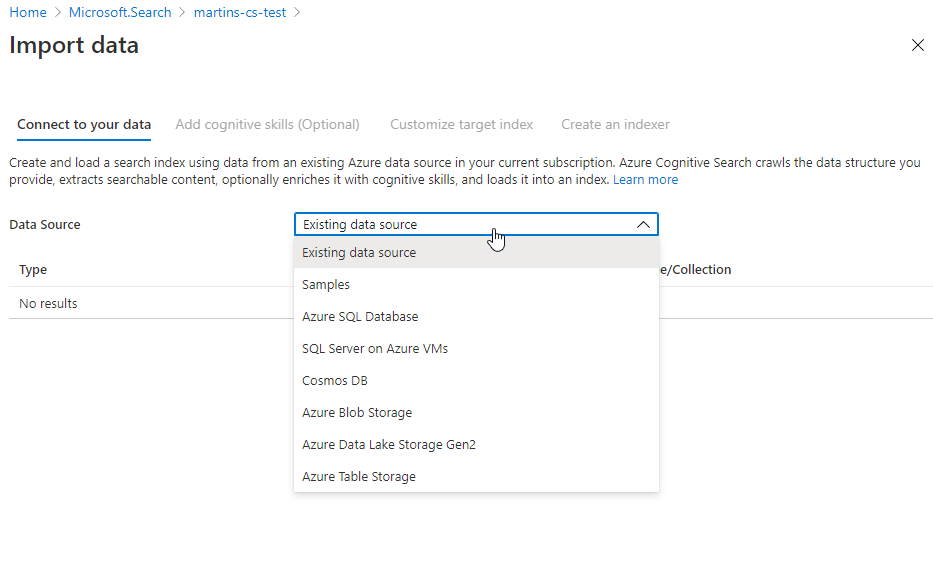
3) The first step in the wizard is the “Connect to your data” tab. That means that on this page you can connect to multiple data sources. As you can see from the picture below, quite a few options are available to choose from (and most likely going to cover all of the use case scenarios). For this exercise, I am going to take “Samples” and SQL database. You can add as many data sources as you want (with the respect to limitations of the selected service Tier type).
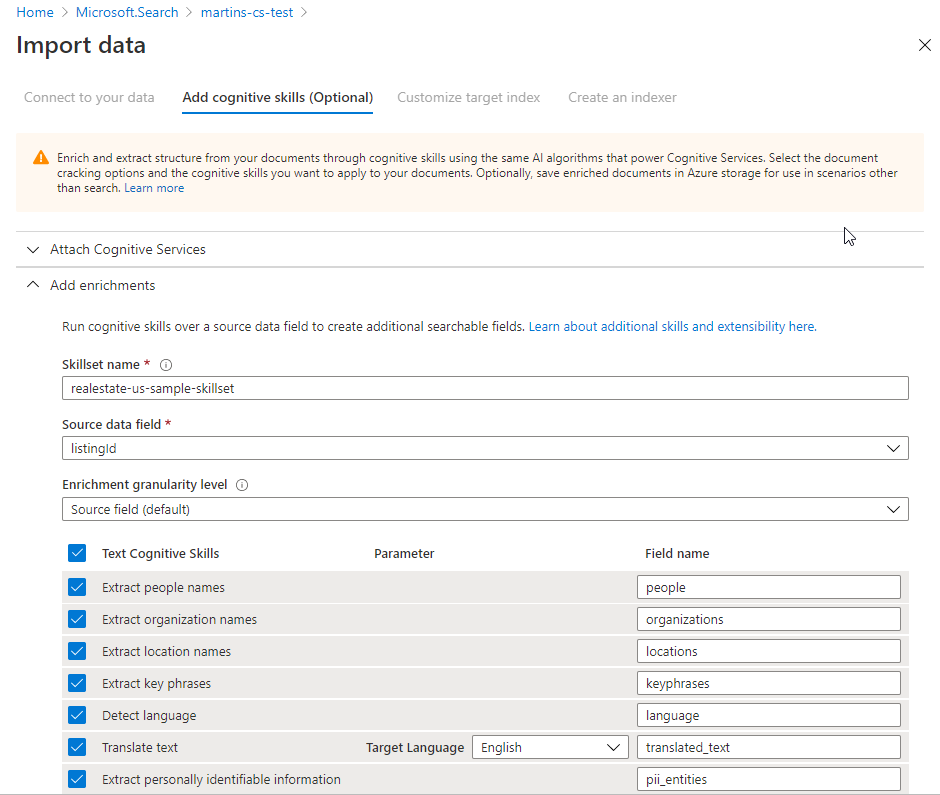
4) At the “Add cognitive skills” tab I decided to add a bunch of additional Text Cognitive Skills, even though this step is optional. My reasons are purely investigative and I would like to see how the @search.score field in returning data result sets is going to look like when trying to search my documents by any of these fields from the Enriched data set.
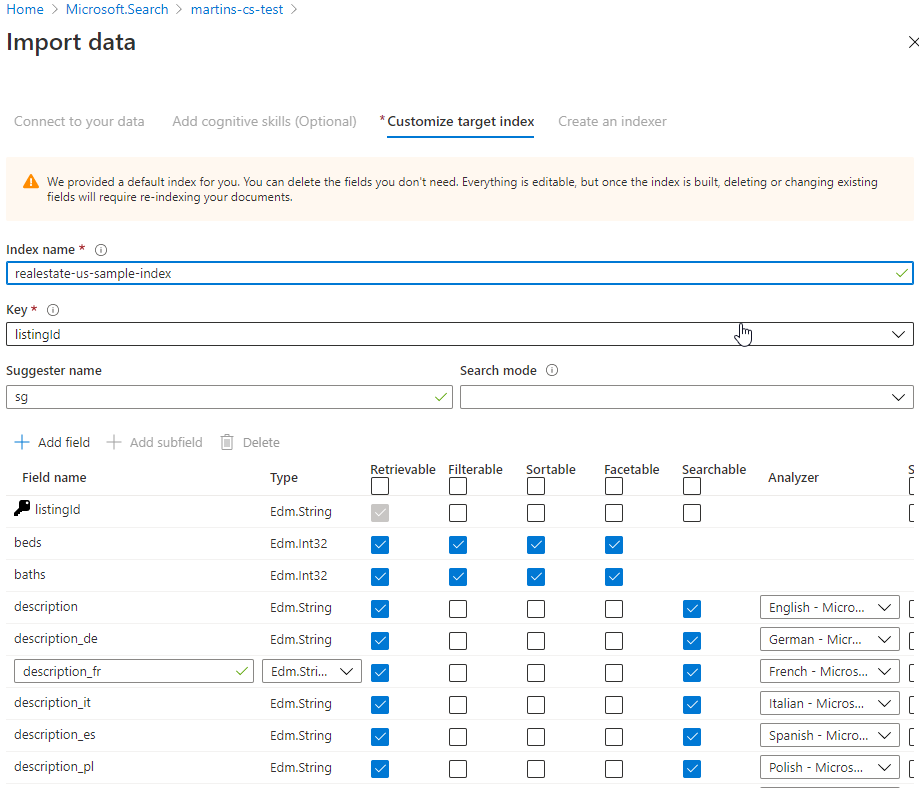
5) In the next step “Customize target index” (sometimes referred to as a “pull model“) I am going to leave all pre-populated settings as they are as I am happy with it for now. In this step, you can configure things like the level of data exposure, data field types, filtering, sorting, etc.
Just to give you a better understanding of what the search index is in this context – think about it as in a relational database a search index equates to a table. And also we have documents, which are the items of the index. Think about them as documents that are roughly equivalent to rows in a table.
Also, remember to keep a Key field in Edm.String data type. This is a mandatory prerequisite.
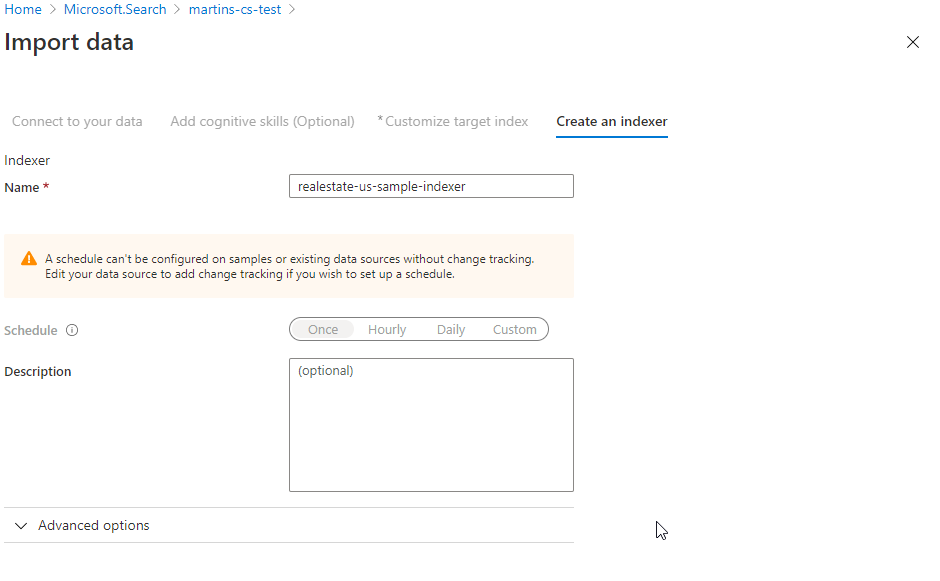
6) In the “Create an Indexer” tab (the way how to index data in a scheduled manner) I am not allowed to configure how often should be mapping table (index) build. The reason for it is that the Sample SQL database I am using in this exercise does not use any Change tracking policies (for example SQL Integrated Change Tracking Policy). Why is needed? Well, basically Cognitive search needs to know when the data delete change happened to address that. You can read more about it here.
For now, I am going to submit this form and move on.
The service starts provisioning itself (this should not take long to finish) and after a couple of minutes, I should have everything ready for testing.
Testing the Search Service
Now, let’s have a look at “Search explorer” from the service level main top menu and craft some data queries. My first query was the “Bachelor-Wohnung” word, which nicely got populated into the URL query as the value of &search element by itself…
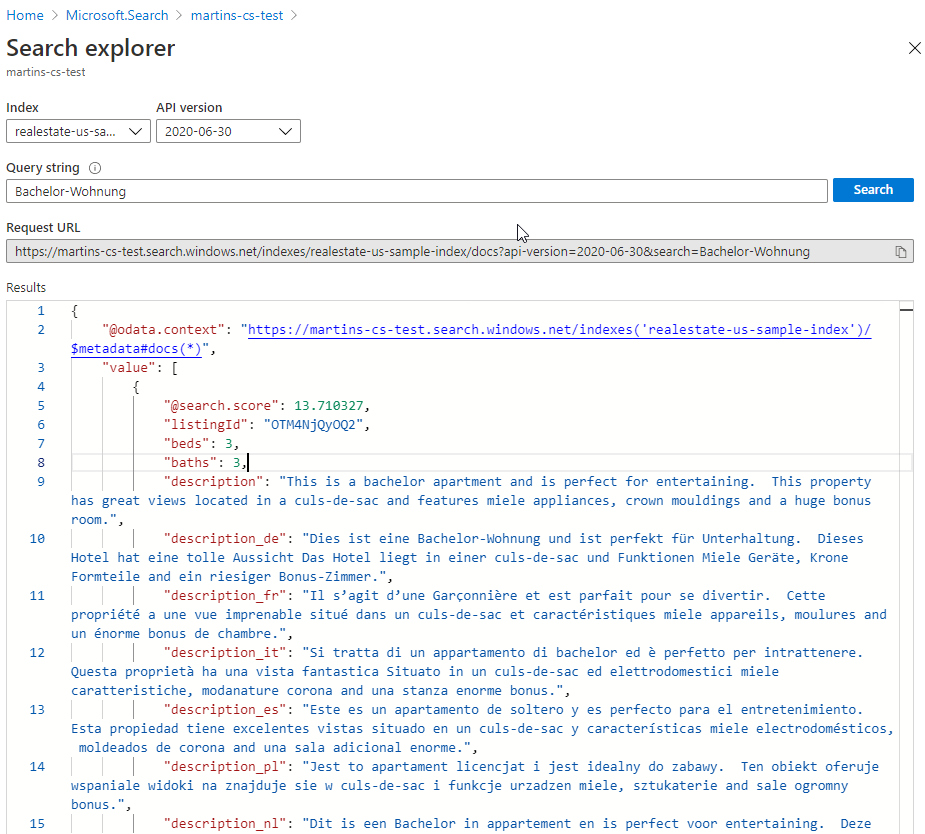
From now on it is all about knowing how to use a query syntax (and you can really go hard on this). For more search query examples visit this MS documentation https://docs.microsoft.com/en-us/azure/search/search-explorer?WT.mc_id=Portal-Microsoft_Azure_Search
I have to say that building this service did take me about 20 minutes (for someone who has some experience already) from having nothing to an easy-to-configure and scale search engine. Anyone should be able to build the first Cognitive search service by a similar time after reading this post now.
If there are any questions or want to know more about this service, visit this site built by Microsoft at https://docs.microsoft.com/en-us/azure/search/. These people did a really great job in documenting all of it. This material should help you to elevate your skills to a more advanced level.
What is the Azure Cognitive Search Tiers pricing
| _ | FREE | BASIC | STANDARD S1 | STANDARD S2 | STANDARD S3 | STORAGE OPTIMIZED L1 | STORAGE OPTIMIZED L2 |
|---|---|---|---|---|---|---|---|
| Storage | 50 MB | 2 GB | 25 GB (max 300 GB per service) | 100 GB (max 1 TB per service) | 200 GB (max 2 TB per service) | 1 TB (max 12 TB per service) | 2 TB (max 24 TB per service) |
| Max indexes per service | 3 | 15 | 50 | 200 | 200 or 1000/partition in high density1 mode | 10 | 10 |
| Scale out limits | N/A | Up to 3 units per service (max 1 partition; max 3 replicas) | Up to 36 units per service (max 12 partition; max 12 replicas) | Up to 36 units per service (max 12 partition; max 12 replicas) | Up to 36 units per service (max 12 partition; max 12 replicas) up to 12 replicas in high density1 mode | Up to 36 units per service (max 12 partition; max 12 replicas) | Up to 36 units per service (max 12 partition; max 12 replicas) up to 12 replicas in high density1 mode |
| Document Cracking: Image Extraction | N/A (only 20 documents supported) | (price per 1,000 images) 0-1M images – $1.512 1M-5M images – $1.210 5M+ images – $0.983 | (price per 1,000 images) 0-1M images – $1.512 1M-5M images – $1.210 5M+ images – $0.983 | (price per 1,000 images) 0-1M images – $1.512 1M-5M images – $1.210 5M+ images – $0.983 | (price per 1,000 images) 0-1M images – $1.512 1M-5M images – $1.210 5M+ images – $0.983 | (price per 1,000 images) 0-1M images – $1.512 1M-5M images – $1.210 5M+ images – $0.983 | (price per 1,000 images) 0-1M images – $1.512 1M-5M images – $1.210 5M+ images – $0.983 |
| Private Endpoints Related Charges | N/A | Additional charges may apply2 | Additional charges may apply2 | Additional charges may apply2 | Additional charges may apply2 | Additional charges may apply2 | Additional charges may apply2 |
| Price per unit | Free | $0.153/hour | $0.509/hour | $2.033/hour | $4.065/hour | $5.805/hour | N/A |
Overall Azure service rating
- it is very easy to create your own search SaaS in a couple of minutes
- the intuitive way how to integrate new data sources into the service
- easy to leverage cognitive capabilities in features like OCR
- CONVENIENCE – zero coding is required on the service side, all search service settings can be configured in the Azure portal
Thanks for staying, subscribe to my blog, and leave me a comment below.
cheers\
