

Choosing the right way how to keep an infrastructure versioned and well maintained in source code is becoming a quite big issue these days.
There are several options to choose from on the market currently, and it’s easy to get trapped in a never-ending research cycle.
For those working with Azure services only, ARM Templates are more than an obvious answer to this but what if want to have more flexibility in going beyond the Azure boundaries?
You may be wondering why I should use anything else but ARM templates?
The answer is simple.
The ARM templates may be a bottleneck for the IT solutions using different cloud providers (multi-cloud solutions). In this case, managing infrastructure as a code may become a quite tricky (and ugly) thing to do overtime. The thing is that every tool used for infrastructure management has its “own ways” of how to work with it and that comes with the necessary knowledge base every production team must have beforehand.
And as an implication of this, choosing the right tool for your infrastructure management (including deployment) is very important.
Terraform would be a great way how to face this challenge. Just as the proof of its simplicity, what I would like to show you here is a short demonstration of how easy it is to provision Azure function in the Azure cloud by using the HashiCorp Configuration Language (HCL) and TF (Terraform) CLI utility in PowerShell.
You might be wondering, what features does TF has over the ARM templates?
Well, these infrastructure management tools have “the same” set of functionality but TF has other perks on top of that, which makes it a more secure and convenient tool for DevOps (besides multicolored cloud support).
Key features are:
- HCL (HashiCorp Configuration Language) – high-level configuration syntax, well structured and intuitive language (TF also supports configuration using JSON for these JS geeks)
- Execution Plans – shows you exactly what is going to happen with infrastructure before the change is getting executed
- Resource Graph – the visual understanding of the infrastructure, and in my opinion, Terrafarom has done a very good job on this feature (don’t forget that it’s OpenSource!)
- Change Automation – yes, every change needed on infrastructure can be automated -> which means less human interaction -> and less room for human errors, YAY!
If you’re new to Terraform and want to get a feel of what Terraform is, have a look at this introduction video footage with the Co-Founder and CTO Armon Dadgar.
Prerequisites (before we start)
- Terraform utility downloaded and configured on the local environment (guide of how to do it … here)
for Win10 users, in case of having an issue with WSL2, I recommend following this article to get over this issue - Azure CLI is installed and ready to roll (guide on how to do it … here)
Steps to follow
For these going exactly step by step as described in this guide make sure that any resource name starting with ‘ms‘ needs to be unique.
I recommend using some other characters as prefixes just to be sure that this exercise on your side will go smoothly. You won’t go far with the copy&paste technique here – oops!
- Log in to Azure by using Azure CLI (Azure Command Prompt) or PowerShell
az login2. If you have multiple subscriptions, skip this step otherwise. List them all out by running this command and choose the one wanted to be used (subscription_id )
az account list
3. Find out what is the latest supported AzureRM provider here (at this time of writing this post 2.29.0). This step is not mandatory but I would highly recommend doing it this way as AzureRM API might change in the future so better to have a version of the CLI referenced to the code batch file.
4. Create a folder and the file within main.tf (mine is located at c:/Temp/terraform-test/)
5. Add this snipped code at the beginning of the file. This will configure Azure CLI authentication in Terraform
provider "azurerm" {
  version = "=2.29.0"
  subscription_id = "<your Azure subscription id from the step 1 or 2>"
  features {}
}
6. Append the file with the rest of the script from below.
For this exercise, the data center in Australia Central is going to be used (but change it if you like), new Azure function is going to be using the consumption service plan as well as running on Windows OS (this is the default option anyway – change it to the Linux if you wish)
resource "azurerm_resource_group" "example" {
  name     = "azure-functions-cptest-rg"
  location = "australiacentral"
}

resource "azurerm_storage_account" "example" {
  name                     = "msfunctionsapptestsa"
  resource_group_name      = azurerm_resource_group.example.name
  location                 = azurerm_resource_group.example.location
  account_tier             = "Standard"
  account_replication_type = "LRS"
}

resource "azurerm_app_service_plan" "example" {
  name                = "azure-functions-test-service-plan"
  location            = azurerm_resource_group.example.location
  resource_group_name = azurerm_resource_group.example.name
  kind                = "FunctionApp"

  sku {
    tier = "Dynamic"
    size = "Y1"
  }
}

resource "azurerm_function_app" "example" {
  name                       = "mstest-azure-functions"
  location                   = azurerm_resource_group.example.location
  resource_group_name        = azurerm_resource_group.example.name
  app_service_plan_id        = azurerm_app_service_plan.example.id
  storage_account_name       = azurerm_storage_account.example.name
  storage_account_access_key = azurerm_storage_account.example.primary_access_key
}
7. Navigate to the folder with main.tf file created, open Command prompt or PowerShell, and type this command below
terraform initThis action will the create selections.json file at .terraform\plugins\ and download the AzureRMplugin into the .terraform\plugins\registry.terraform.io\hashicorp\azurerm\2.29.0\windows_amd64 directory.
The CLI utility starts its live time with the batch files from now on – a perfect isolation approach from the running environment (although the CLI utility itself may be quite hungry for disk space!).

8. You can skip this step if in hurry but continue reading if you want to know more about how to generate the infrastructure change plan …
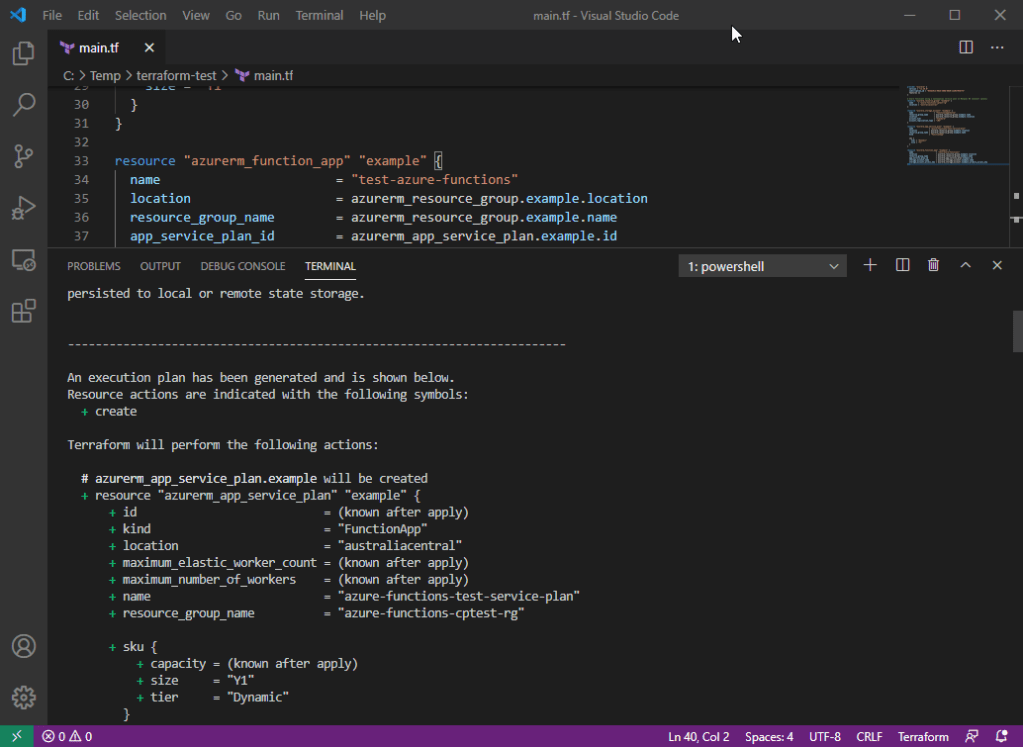
Open the Command prompt or PowerShell and run this command from below to see the infrastructure plan before the change execution.
I can strongly recommend using some advanced IDE like MS Code for working with TF (because the text editor and the command console are all integrated into one app) as opposed to switching from the text editor back to the command console – this can be annoying…
terraform planThe plan should look similar to the screenshot below. For those using MS Code, I would recommend downloading the HashiCorp Terraform extension to accelerate your further IaC development – I found it very useful in time efficiency!
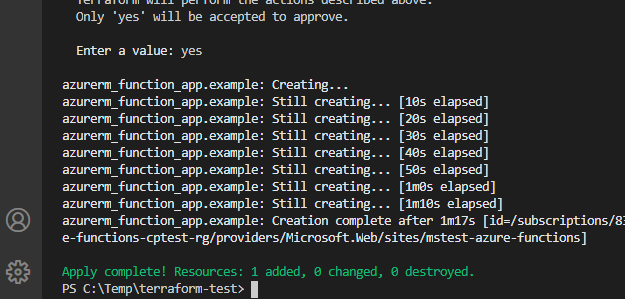
9. Let’s get ready for D-day. Type this command to apply and execute the changes to Azure
terraform applyThis command is going to generate the infrastructure change plan and prompts the confirmation message to the user – I am happy with the planning changes, so typing yes.

10. ..and if everything has finished successfully, you should be able to see this message in the end

Entire main.tf file content
provider "azurerm" {
  version = "=2.29.0"
  subscription_id = "834b29c3-9626-408d-88e0-12e92793d1f5"
  features {}
}

# Azure functions using a Consumption service plan on Windows OS (default option)
resource "azurerm_resource_group" "example" {
  name     = "azure-functions-cptest-rg"
  location = "australiacentral"
}

resource "azurerm_storage_account" "example" {
  name                     = "msfunctionsapptestsa"
  resource_group_name      = azurerm_resource_group.example.name
  location                 = azurerm_resource_group.example.location
  account_tier             = "Standard"
  account_replication_type = "LRS"
}

resource "azurerm_app_service_plan" "example" {
  name                = "azure-functions-test-service-plan"
  location            = azurerm_resource_group.example.location
  resource_group_name = azurerm_resource_group.example.name
  kind                = "FunctionApp"

  sku {
    tier = "Dynamic"
    size = "Y1"
  }
}

resource "azurerm_function_app" "example" {
  name                       = "mstest-azure-functions"
  location                   = azurerm_resource_group.example.location
  resource_group_name        = azurerm_resource_group.example.name
  app_service_plan_id        = azurerm_app_service_plan.example.id
  storage_account_name       = azurerm_storage_account.example.name
  storage_account_access_key = azurerm_storage_account.example.primary_access_key
}
Also available on GitHub https://github.com/stenly311/Terraform-AzureFunction-InAzure
Overall Terraform CLI rating
- Cloud provider portability
- Fewer lines needed to achieve the same infrastructure configuration need compering to Azure ARM Templates
- Intuitive and fast to learn
- OpenSource with a wide collection of “get-started” production like examples
Thanks for staying, subscribe to my blog, and leave me a comment below.
cheers\
